
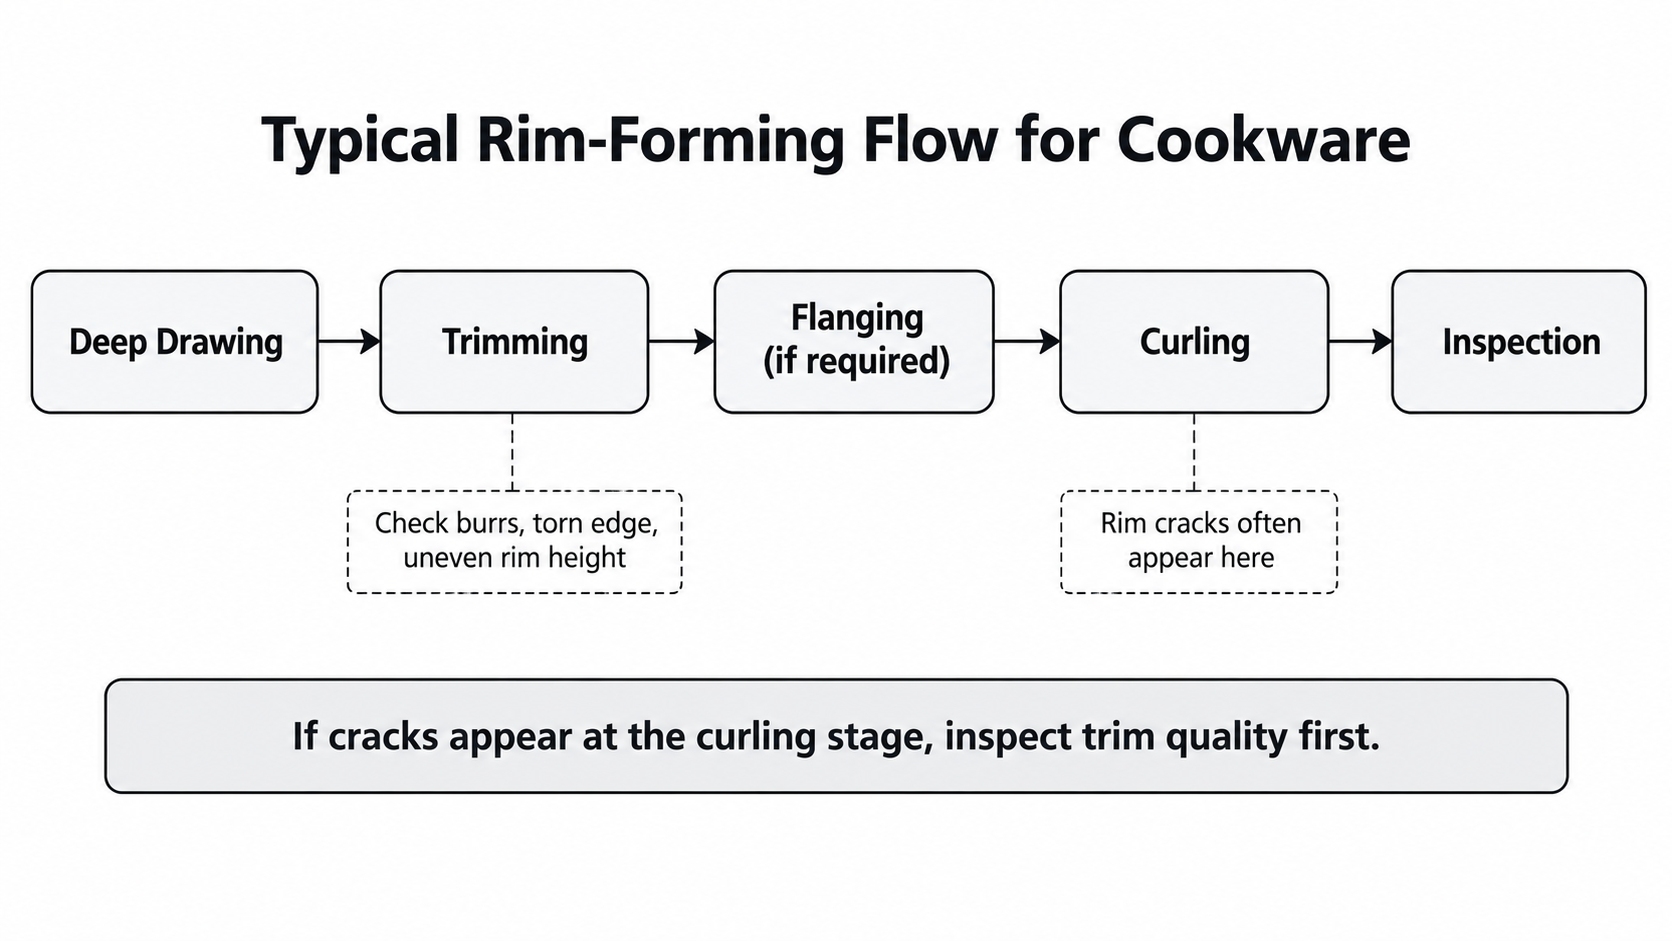
A pot rim splits at the curler. On most lines the first reaction is to go after the curling machine: move the rollers, change the pressure, slow it down, sometimes all three in that order. Then the next batch comes out and the splits are in the same spots as before.
If that sounds familiar, stop touching the curler for a minute. The rim may already have been damaged before it reached the curler, so the trimming station is worth checking before changing the roller settings.The curler just bent the metal until the problem showed up.
There’s a quick way to tell. Look at where the cracks sit. Same positions on pot after pot? Then it’s something in the part, usually the high points of an uneven rim or a bad stretch of cut edge. Cracks scattered with no pattern are a different story, and you’d be looking at material consistency, tool condition or lubrication instead.
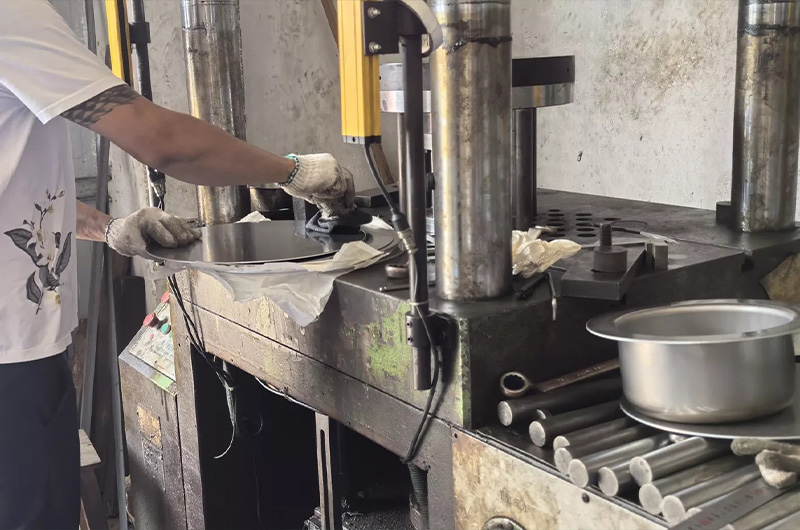
Check the trim first
A burr is a thin lip of metal standing up along the cut. When the rim is rolled over, the metal around the burr has to move with it, and that’s where a crack likes to start. A torn edge looks dull and rough where a good cut would look smooth and even, because the metal pulled apart instead of shearing. Uneven rim height comes from earing. Deep drawing doesn’t stretch sheet metal equally in every direction, so the top edge of a drawn pot is wavy until trimming levels it. When trimming doesn’t, part of the rim meets the curling tool in a different condition from the rest.
All of this can be checked at the machine without changing a single setting. Take a pot straight off the trimming station, before it goes anywhere near the curler, and look along the edge under a bright light. A cloth drawn carefully along the cut will catch on burrs your eye misses. Measure the height at several points around the pot. Then take a pot that has already cracked, mark where the splits are, and hold that against the rough or high spots on an uncurled one. If they match, that’s your answer.
Fixing the trim usually isn’t a matter of cutting harder. A worn or chipped blade, a clearance that no longer suits the material, a pot sitting off-center in the fixture, an uneven body coming out of the draw: any of these gives you the same bad edge. A rough cut points at the blade and the clearance. Uneven height points at how the pot is located and held while it’s cut.
Stainless vs. aluminum clearance
Trimming clearance depends on the material grade, its temper, its thickness and the state of the tooling, so it can’t simply be carried over from one cookware material to another. A setup that cuts aluminum cleanly may leave a burr or a torn surface on stainless, even when the pot shape is identical. Change the material or the thickness and the trimming setup needs a fresh look. Keep a record of which material, thickness and tooling each setup was made for, because when rims start cracking after a new coil arrives, that record is the first thing you’ll want.
Splits and wrinkles are not the same problem
They show up at the same station, which is why people treat them as one. They aren’t.
For a split bead, start at the trimmed edge: burrs, small tears and edge cracks cause most of them. A clean edge means looking at the curl itself, meaning how tight the bead is and how much the metal is being asked to bend. A pot that has been through several forming steps has less left to give than one that hasn’t, so a curl geometry that was fine on a shallow pot can be too much for a deeper one. Check the curling tool surfaces as well. A rough or worn one can mark the rim as it rolls.
A wrinkled flange points somewhere else. Look at how the part is held and guided into the tools, whether clamping is even, whether the rollers are aligned, whether the rim coming in is uniform. Variation in rim height or wall thickness around the pot can show up as wrinkles in the sections carrying extra material. More pressure rarely helps. If the rim arrives uneven, pushing harder just gives you a different defect.
|
|
|
|
|
|
|
|
|
|
|
|
|
|
|
|
|
|
|
|
Standalone machines or an integrated line
The rule of thumb is simple. Many pot sizes and frequent changeovers favor standalone machines: a cookware edge trimming machine, a pot rim flanging machine and a cookware edge curling machine, each adjusted on its own. When something goes wrong you can tell which station did it. One product at steady volume favors an integrated line, where fewer transfers mean fewer chances to knock the edge about between steps.
Neither layout fixes a bad trim.An integrated line can move parts between stations more efficiently, but it will not correct a burr left by the trimming process.Before choosing, write down your pot diameters, materials, thicknesses, required output and how often the product changes. Those tell you more than a machine’s rated speed.
MOSTRO designs cookware production lines around the customer’s product range, capacity and floor space, with dedicated solutions for stainless steel cookware and triply cookware. The process includes sample production and equipment testing. Use that stage properly: send the awkward parts, your thickest material, your deepest draw, the biggest and smallest diameters, and check the rim after every station, not only at the end.